
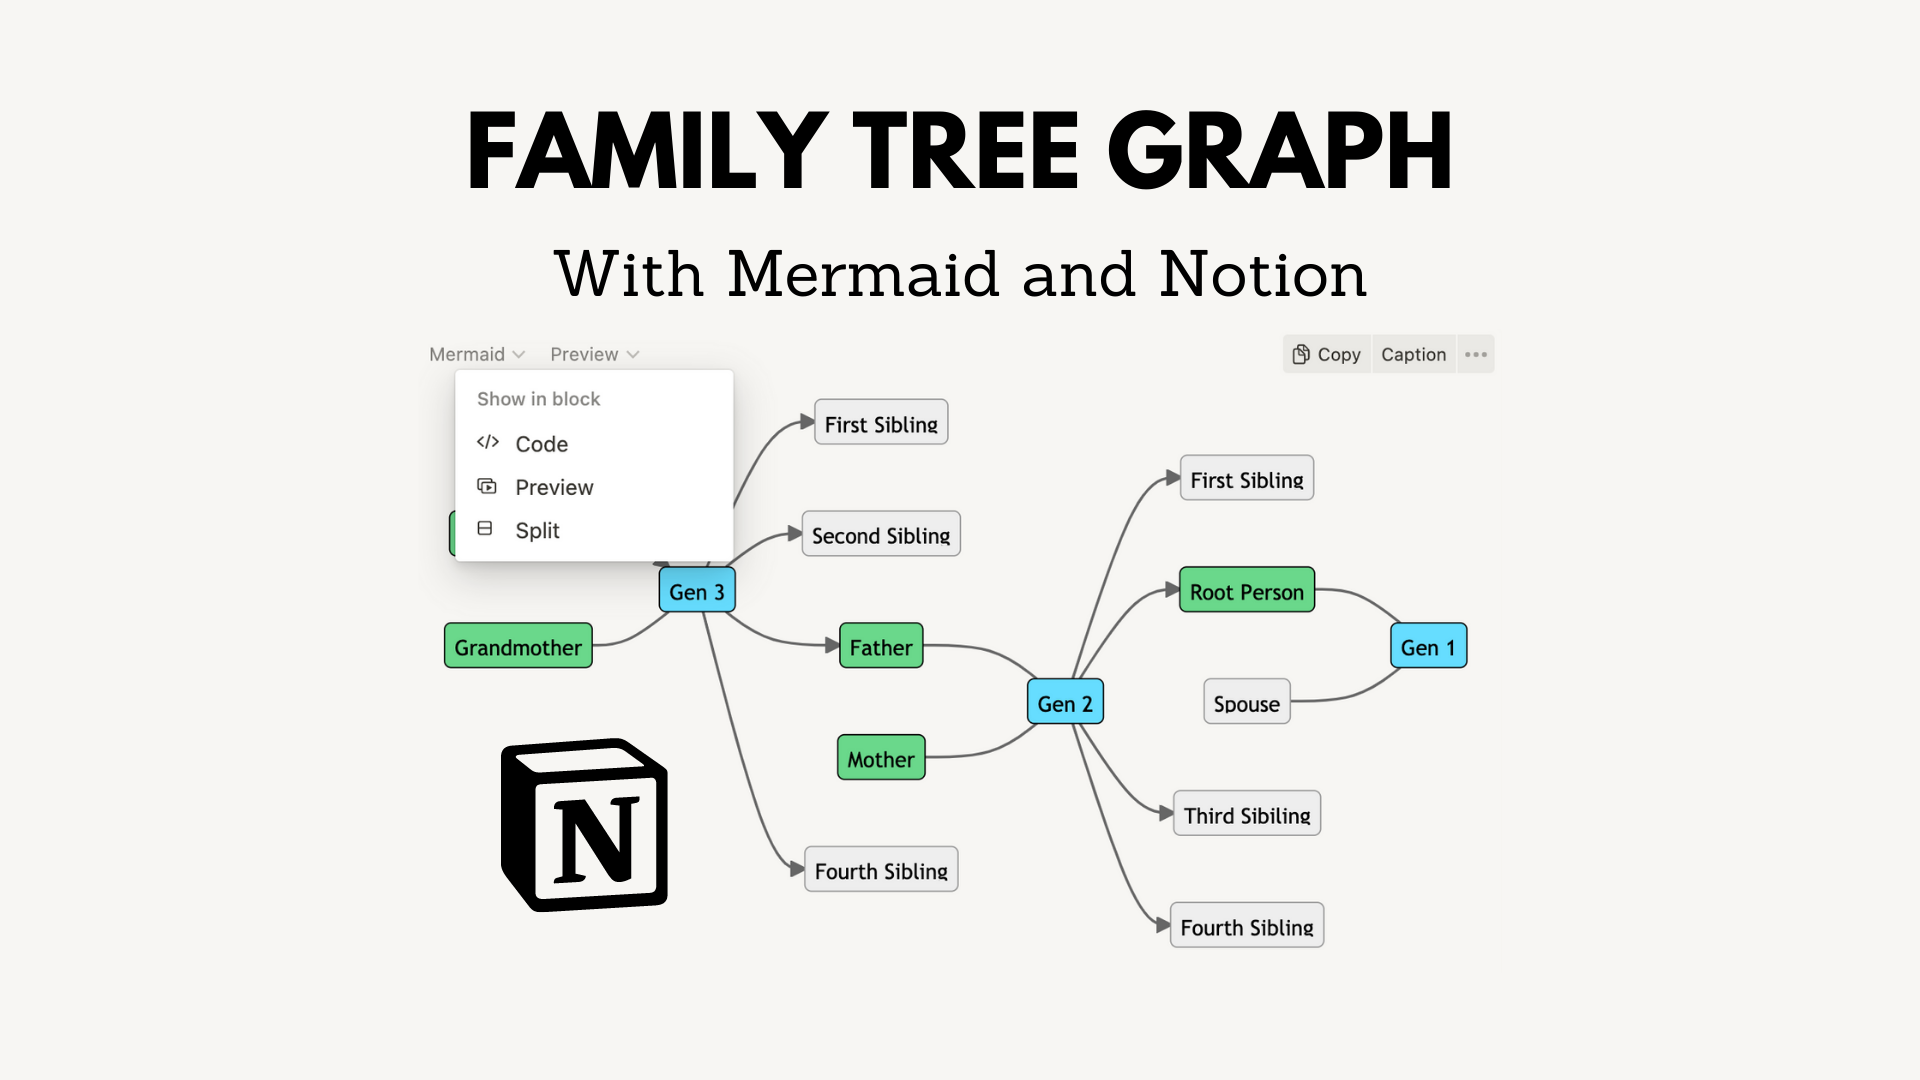
✏️ Custom Flowcharts
Mermaid is a code language that allows one to create a flowchart, pie chart, Gantt chart, and more. One tricky part of the Mermaid language is the ability to control where connections between nodes lie related to the orientation of the graph. For a family tree graph, a classic flowchart may appear too busy. Here is how to make a Mermaid family graph easy to follow.
Recommended Reading

Mermaid Flowcharts
How to create and organize code for Mermaid flowcharts in Notion and beyond!
Step 1: Chart Orientation
If you are using Notion to create this chart, enter the block menu anywhere in a page (“ trigger: /”) and select “Code". Change the code language to Mermaid to get started.
There are four ways to show Mermaid flowcharts. I recommend LR for family tree graphs. Here are the orientations:
LR: Left to right
RL: Right to left
TB: Top to bottom
BT: Bottom to top
Root Person in this instance is part of the second generation in the tree. Root and their spouse have children in the first generation that do not show in the graph.
flowchart LR

Or(Root Person)
Or --- G1(Gen 1)
Sp(Spouse) --- G1
Step 2: Adding Parents
Next, add parents to the root member. Each node labelled G# is a generation. Root member’s parents are connected to G2(Gen 2) … and G2(Gen 2) is connected to Or(Root Person) like this:
Fa(Father) ---> G2(Gen 2)
Mo(Mother) ---- G2
G2 --> Or(Root Person)flowchart LR %% GENERATION 3 %% Fa(Father) ---> G2(Gen 2) Mo(Mother) ---- G2 %% GENERATION 2 %% G2 --> Or(Root Person) Or(Root Person) Or --- G1(Gen 1) Sp(Spouse) --- G1
Step 3: Adding Siblings
Connect the generation nodes to siblings as well. The orientation of code should have eldest sibling at the top and youngest below like this:
G2 --> S1(First Sibling)
G2 --> Or(Root Person)
G2 --> S3(Third Sibling)
G2 --> S4(Fourth Sibling)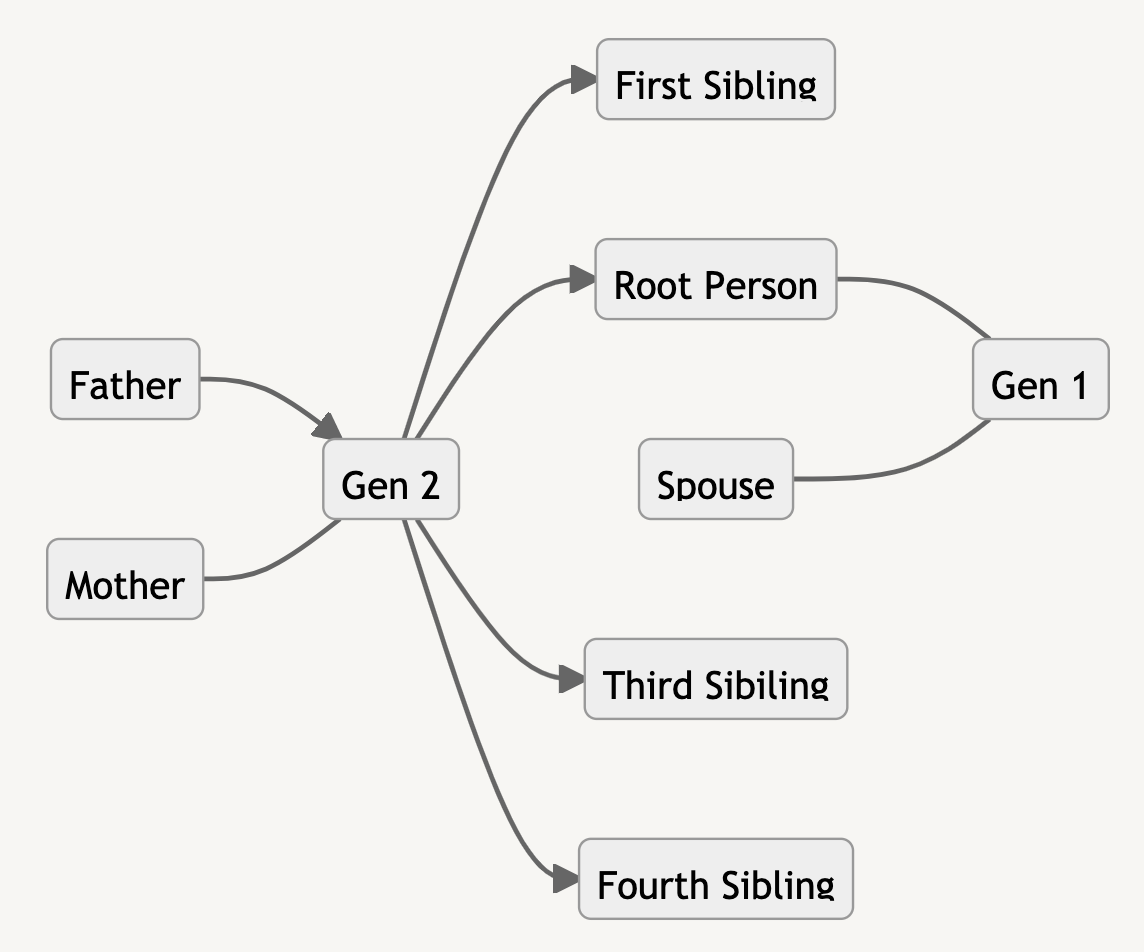
flowchart LR

%% GENERATION 3 %%
Fa(Father) --> G2(Gen 2)
Mo(Mother) --- G2

%% GENERATION 2 %%
G2 --> S1(First Sibling)
G2 --> Or(Root Person)

Or(Root Person)
Or --- G1(Gen 1)
Sp(Spouse) --- G1

G2 --> S3(Third Sibiling)
G2 --> S4(Fourth Sibling)
Step 4: Adding Grandparents
Next, give root member’s mother and father a set of parents (grandparents). After which, aunts and uncles can be added in the same way as the siblings in Step 3.
Now, Father is connected both from G3(Gen) and to G2(Gen). You can write this connection via code like this:
G3(Gen 3) --> Fa(Father) --> G2(Gen 2)flowchart LR %% GENERATION 4 %% Fa1(Grandfather) --> G3(Gen 3) Mo1(Grandmother) --- G3 %% GENERATION 3 %% G3 --> Fa(Father) --> G2(Gen 2) Mo(Mother) --- G2 %% GENERATION 2 %% G2 --> S1(First Sibling) G2 --> Or(Root Person) Or(Root Person) Or --- G1(Gen 1) Sp(Spouse) --- G1 G2 --> S3(Third Sibiling) G2 --> S4(Fourth Sibling)
Step 5: Adding Color
To color nodes, add a section in the code designated to colors. Add a new classDef prefix to each color configuration like this:
%% Colors %%
classDef blue fill:#66deff,stroke:#000,color:#000
classDef green fill:#6ad98b,stroke:#000,color:#000
You can add a color to any node in the graph by adding the defined color to the end of a node like this:
Fa(Father):::green --- G2(Gen 2):::blueflowchart LR %% Colors %% classDef blue fill:#66deff,stroke:#000,color:#000 classDef green fill:#6ad98b,stroke:#000,color:#000 %% GENERATION 4 %% Fa1(Grandfather):::green --> G3(Gen 3):::blue Mo1(Grandmother):::green --- G3 %% GENERATION 3 %% G3 --> U1(First Sibling) G3 --> U2(Second Sibling) G3 --> Fa(Father):::green --- G2(Gen 2):::blue Mo(Mother):::green --- G2 G3 --> U4(Fourth Sibling) %% GENERATION 2 %% G2 --> S1(First Sibling) G2 --> Or(Root Person):::green Or --- G1(Gen 1):::blue Sp(Spouse) --- G1 G2 --> S3(Third Sibiling) G2 --> S4(Fourth Sibling)
Plan and track the month's fitness accomplishments with the template button and general tracking properties in Notion! This template is a simple calendar database with various easy at-home workouts to follow inside. Every workout only requires body weight and no extraneous weights or equipment. Included is a simple weight loss tracker.